
Showing posts with label Birthday. Show all posts
Showing posts with label Birthday. Show all posts
Sunday, March 2, 2014
You're the Icing on the Cake
Friday, February 28, 2014
Lots and Lots of Candles

Sunday, February 16, 2014
Make a Wish with Perfect Pennants

I stamped the cupcake from Itty Bitty in each color a few times and then punched them out with the 1/2 inch circle punch. I then punched out the scalloped circles with the 7/8 inch scallop circle and mounted the cupcakes. I had my Old Olive ribbon from last years Occasions mini and it was the only Old Olive ribbon I could find! I guess I need to put some on my order list... or figure out where my other is! I stamped the make a wish from the new stamp set Perfect Pennants. This was my must have item from this year's Occasions catalog. I knew right away that I had to have it (and the matching framelits but I didn't use them on this card). My card base is Melon Mambo.
Ask me how you can get a FREE Sale-A-Bration item for every $50 you spend before tax and shipping!!
Shelly
Monday, July 11, 2011
On a Birthday Roll
Here is the card I designed for the Waltzingmouse Sketch Challenge. For the original link please see the post below. I made this for Maddox, the twin brother. I shared with you last week the card I made for his twin sister. It does not seem like they should be one!!
![]() Card Recipe:
Card Recipe:
Cardstock: SU!'s Poppy Parade, So Saffron, Tempting Turquiose, and Whisper White
Patterned Paper: SU! Pawsitively Prints II
Inks: SU!'s Poppy Parade, So Saffron, Tempting Turquiose
Stamp Sets: Itty Bitty Bits and Bring on the Cake
Ribbon: SU! Poppy Parade 1/2" Stitched Poly Ribbon
Other: Various Circle and Scallop Punches, Stampin' Dimensionals, and Adhesive
I have yet to start on the color challenge, but the night is young!!
Shelly
Friday, July 8, 2011
Happy Birthday!
I came upon Waltzing Mouse Sketch Challenge a few hours to late to enter my card that I made, but that's okay. I am helping to celebrate three birthdays this weekend so I needed some birthday cards anyways and I thought the sketch was perfect for what I wanted to do for Alana's card. She will be the BIG ONE along with her twin brother!
Here is the original sketch:
![]() And here is the design I came up with:
And here is the design I came up with:
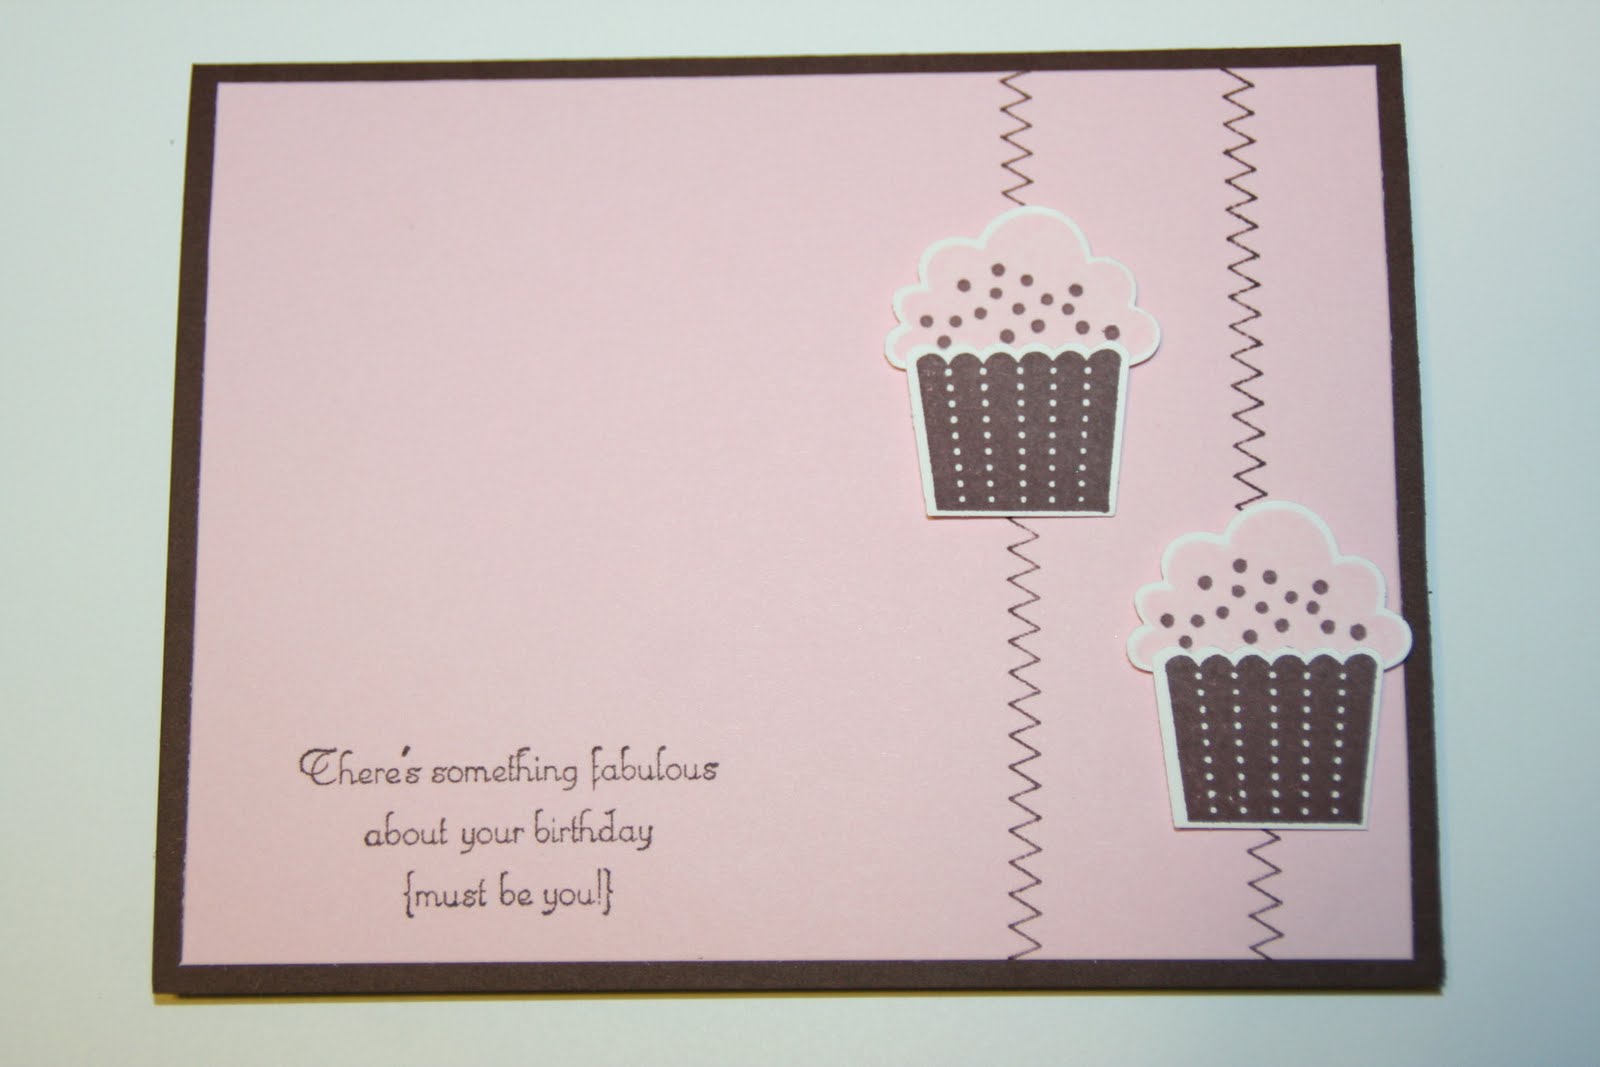
![]() Sorry if the sentiment seems a little out of focus. I took the picture several times and it just always seemed to be blurry. So, are you thinking where did she get that zig zag stamp?? Well, wonder no more. It is actually Stampin' Up!'s In Stitches Jumbo Wheel (pg. 143 of the 2011-2012 IB&C). Whenever I see a wheel that I think will be awesome for making my own patterned paper or to add something extra to a card like this one... I always buy an extra one. I keep one of them as a wheel and then I peel the rubber off of the other one. You can easily mount them onto Cling Mount foam (#124236 on pg. 205) and then make your own design that fits your project. There are even some new ones in this catalog that will also be perfect for this. (HINT: Buttons & Blossoms #124088) and I would highly recommend the Clear-Mount Perfectly Placed Guides (#121785) when using these because it really makes a big difference in getting everything straight! Be sure to pop those cupcakes up!!
Sorry if the sentiment seems a little out of focus. I took the picture several times and it just always seemed to be blurry. So, are you thinking where did she get that zig zag stamp?? Well, wonder no more. It is actually Stampin' Up!'s In Stitches Jumbo Wheel (pg. 143 of the 2011-2012 IB&C). Whenever I see a wheel that I think will be awesome for making my own patterned paper or to add something extra to a card like this one... I always buy an extra one. I keep one of them as a wheel and then I peel the rubber off of the other one. You can easily mount them onto Cling Mount foam (#124236 on pg. 205) and then make your own design that fits your project. There are even some new ones in this catalog that will also be perfect for this. (HINT: Buttons & Blossoms #124088) and I would highly recommend the Clear-Mount Perfectly Placed Guides (#121785) when using these because it really makes a big difference in getting everything straight! Be sure to pop those cupcakes up!!
Here is a photo of the rubber after I removed it from the wheel and trimmed out the pattern that I wanted:
![]()
Card Recipe:
Cardstock: SU! Chocolate Chip, Pink Pirouette, and Whisper White
Inks: SU! Chocolate Chip and Pink Pirouette
Stamps: SU! Create a Cupcake
Punches: SU! Cupcake Builder
Other: Stampin' Dimensionals, Adhesive
Here is the original sketch:

Here is a photo of the rubber after I removed it from the wheel and trimmed out the pattern that I wanted:

Card Recipe:
Cardstock: SU! Chocolate Chip, Pink Pirouette, and Whisper White
Inks: SU! Chocolate Chip and Pink Pirouette
Stamps: SU! Create a Cupcake
Punches: SU! Cupcake Builder
Other: Stampin' Dimensionals, Adhesive
Subscribe to:
Posts (Atom)