I don't know that there is such a thing as a simple thank you. Even if the card has a clean and simple design the feelings of appreciation mean so much. I designed this card with two challenges in mind. The first was a sketch challenge by Freshly Made Sketches that you can see here and then a thank you theme challange by The Paper Players that you can see here.
I kept trying to use a rectangular piece of DSP in the center and it just wasn't working for my card. I ended up pulling out my Labels Collection Framelits and cropping my Sycamore Street DSP that I got during last year's Sale-A-Bration. I used Pool Party as my card base. I colored one of the flowers from Posy Punch using my Summer Starfruit Stampin' Write Marker and then the petals with my Rich Razzleberry one. I punched it out using the Fancy Flower Punch. I did pop it up on dimensionals. My thank you sentiment comes from the set Wishes Your Way.
Monday, March 3, 2014
Sunday, March 2, 2014
You're the Icing on the Cake
My sister has a birthday this week so this card is on its way to New York, the place I called home for many years. I used this week's sketch over at Pals Paper Arts to help me design the basic layout of the card. Then, I sent a random text to my sister telling her to give me a color. She texted back purple but surprisingly didn't ask why I was asking. So, I turned to Rich Razzleberry in my Color Coach and it had it paired with Old Olive and Pumkpin Pie. I had my colors! Using a sketch and the Color Coach really does half the work for you. I used Rich Razzleberry as my card base and then layered some Pumpkin Pie DSP onto the card front. I used Old Olive for the vertical strip. I stamped 2 of the gift bixes and the cake slice in black StazOn onto Whisper White card stock. Both of these stamps are from the Best of Birthday set. I punched the cake out with a 1.25 inch circle punch and then the presents with a 1 inch circle punch. I colored them using my blender pens and Classic ink pads. I then stamped my sentiment, wish big, onto Whisper White card stock using Rich Razzleberry ink. This is from the stamp set Word Play. I punched it out using the Decorative Label punch. I punched another label out in Rich Razzleberry, cut it across the center and added a little edge to each side of my stamped image. I have had the Candy Dots for a while in the Brights family but never used them. I thought this was a perfect time since I wanted to add a little more color into the Decorative Label. I added three along the edge. I didn't get them even but what are you going to do. I adhered this to the front and I was done. I added a message to the inside and I was ready for the post office. I hope she likes it!
Friday, February 28, 2014
Lots and Lots of Candles
My husband's aunt has a birthday coming up in a few weeks so I thought it was a perfect time to make a birthday card as I played along with Mojo Monday's Tall and Skinny sketch that you cna see here. Tall and skinny cards or anything outside of the A2 framework is hard for me. I am just completely out of my element so a sketch is a great way to try something. I couldn't make my card completely skinny so I did leave the back a little wider than the card front... but not much so my scalloped circles still hang over the edge of the card when closed. I used Bermuda Bay as my card base and then added some 1 inch strips of DSP from the Kaleidoscope DSP available in the Occasions Catalog. I then used a larger piece from the same collection as the larger front panel that was Crushed Curry. I cut a large scalloped circle in black and then a smaller one in Strawberry Slush. I stamped my birthday cake from the Best of Birthdays stamp set in Black Staz-on and colored it in using a blender pen and ink pads. I punched it out with a circle punch and popped it all up. I pulled my ink and cardstock colors from the DSP.
Thursday, February 27, 2014
Hello...
Monday, February 24, 2014
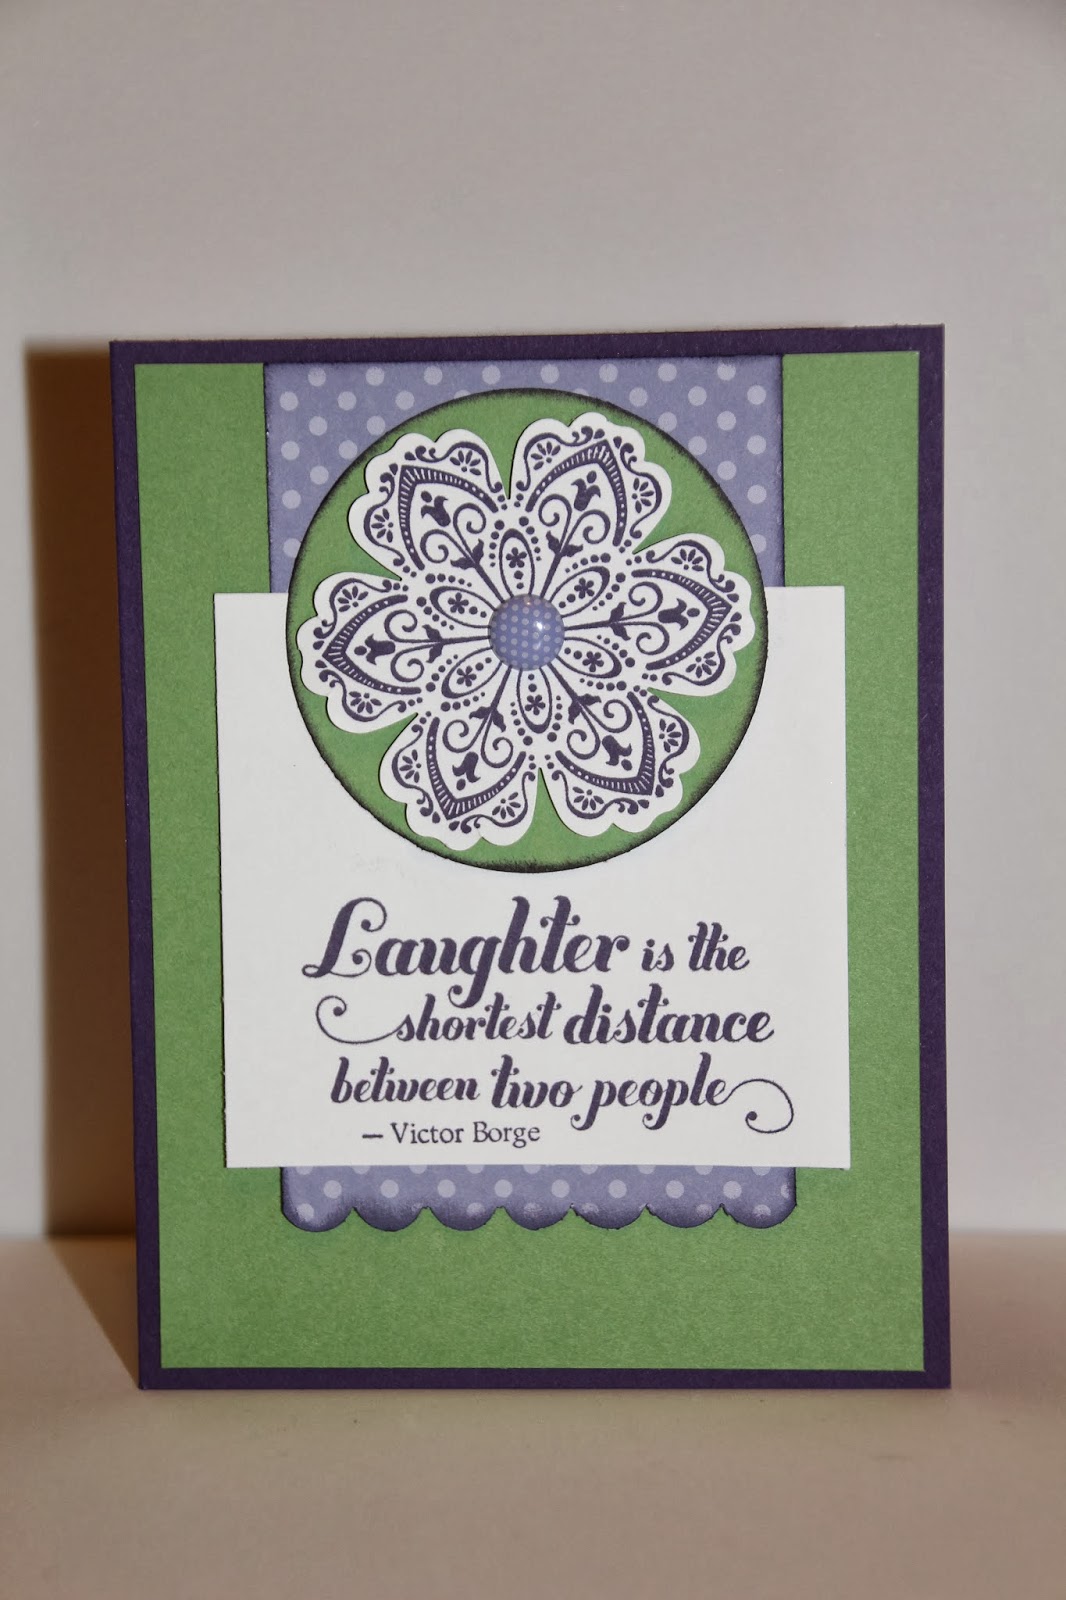
Laughter is the Shortest Distance
I used the colors Elegant Eggplant, Wisteria Wonder, and Wild Wasabi. My card base is Elegant Eggplant and then I layered Wild Wasabi over that for my card front. My center banner is Wisteria Wonder DSP and I added a scalloped edge with the border punch. I stamped my Mixed Bunch flower in Elegant Eggplant and then used a retired In Color Brad in Wisteria Wonder for the center. I wanted it to stand out a little more against the white so I layered a Wild Wasibu circle underneath... I think it was 2.5 inches. I pooped all that up with Stampin' Dimensionals. My sentiment comes from the very popular set Feel Goods. It really is a great set for those just because cards that you want to send to let someone know you are thinking about them. I did use a sponge dauber to go around the DSP and Wild Wasabu circle with Elegant Eggplant ink to add a little extra to the card and help set apart the layers a little more.
Sunday, February 23, 2014
Pleasant Poppies
Freshly Made Sketches put out another great sketch for all of us papercrafters to play along with. You can see it here.
I like using one large image and then cutting it into panels. I stamped Pleasant Poppies in Early Espresso and then colored the poppies with Blushing Bride and the stems with Pear Pizazz... a color combination I got from the Color Coach. After I had it all colored I cut the image and layered each section onto Pear Pizazz cardstock. I then layered those onto a large layer of Blushing Bride. Add a strip of Pear Pizazz ribbon and a Early Expresso button and you are almost done. I didn't want to leave my button bare so I trimmed a very thin strip of Pear Pizazz cardstock and threaded it though my botton holes.
I have an early day tomorrow so I am off to bed!
I like using one large image and then cutting it into panels. I stamped Pleasant Poppies in Early Espresso and then colored the poppies with Blushing Bride and the stems with Pear Pizazz... a color combination I got from the Color Coach. After I had it all colored I cut the image and layered each section onto Pear Pizazz cardstock. I then layered those onto a large layer of Blushing Bride. Add a strip of Pear Pizazz ribbon and a Early Expresso button and you are almost done. I didn't want to leave my button bare so I trimmed a very thin strip of Pear Pizazz cardstock and threaded it though my botton holes.
I have an early day tomorrow so I am off to bed!
Friday, February 21, 2014
It's a Wonderful Life
Pardon the fabulous shadows... I only say fabulous because when you haven't seen the sun in three months you appreciate the shadows even when they mess up the pictures a bit for your blog. I will take any sunshine I can get.
I really love how this card turned out. I dug out a old In Color, Concord Crush, and used it as my card base. Yes, it is okay to dig out those retired colors and use them. I was actually quite surprised it did not make it into the color renovation and return. But, I hung onto mine so I am using it. I used the Papillon Potpourri butterflies and stamped 2 of each of the larger butterflies. I used Real Red, Pumpkin Pie, Wild Wasibi, Pacific Point, Concord Crush, and Daffodil Delight. I stamped them useing VersaMark and then punched them out with the coordinating punch. I was going for a happy kind of rainbow theme. For the Daffodil Delight butterfly you might notice some sparkle. I stamped it with VersaMark, then added Heat and Stick Powder, heated it again, and then added the Dazzling Diamonds glitter. It is so pretty!!
For my sentiment I used the Perfect Pennants set. I used my Stampin' Write markers becasue I wanted the sentiment to be in three different colors. I stamped it onto Whisper White card stock and punched it out with my Decorative Label punch. I punched a second Decorative Label punch out in Pumpkin Pie, cut it lengthwise and added it to either side. I popped it up along with my butterfly. To give your butterfly some added dimension, fold up his wings a little.
This card will be off to a friend of mine!
Ask my how you can get a free Sale-A-Bration item for every $50 that you spend before tax and shipping!!
I really love how this card turned out. I dug out a old In Color, Concord Crush, and used it as my card base. Yes, it is okay to dig out those retired colors and use them. I was actually quite surprised it did not make it into the color renovation and return. But, I hung onto mine so I am using it. I used the Papillon Potpourri butterflies and stamped 2 of each of the larger butterflies. I used Real Red, Pumpkin Pie, Wild Wasibi, Pacific Point, Concord Crush, and Daffodil Delight. I stamped them useing VersaMark and then punched them out with the coordinating punch. I was going for a happy kind of rainbow theme. For the Daffodil Delight butterfly you might notice some sparkle. I stamped it with VersaMark, then added Heat and Stick Powder, heated it again, and then added the Dazzling Diamonds glitter. It is so pretty!!
For my sentiment I used the Perfect Pennants set. I used my Stampin' Write markers becasue I wanted the sentiment to be in three different colors. I stamped it onto Whisper White card stock and punched it out with my Decorative Label punch. I punched a second Decorative Label punch out in Pumpkin Pie, cut it lengthwise and added it to either side. I popped it up along with my butterfly. To give your butterfly some added dimension, fold up his wings a little.
This card will be off to a friend of mine!
Ask my how you can get a free Sale-A-Bration item for every $50 that you spend before tax and shipping!!
Subscribe to:
Posts (Atom)